08-21-2012, 01:33 PM
...hack.initiated...connecting.to.Spyglass.Network...decryption.in.progress...
...Mactan.Network.recognized...encoding.transmission...
...uploading.data...
![[Image: 5.png]](http://lh.discoverygc.com/media/5.png)
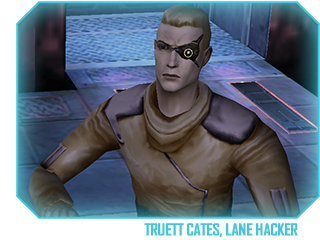
The Lane Hackers
"Making the corporate weenies cry, so our kids can live in a free and just galaxy."
The Lane Hacker Manual is composed of the Technical Manual and the Lore Manual.
The Technical Manual focuses on the technical aspect of the faction and explains how to speak as a Lane Hacker or get the proper IFF or use the appropriate opening and closing text for a communications post.
This manual also provides information about our established smuggling routes. It also offers a small tutorial on how to configure your keyboard or weapon groups. It explains a number of special tactical maneuvers which are required to demonstrate in order to be promoted. Finally, the Technical Manual also describes how to effectively hunt down your targets, update your transponder and provide pilots for Interrogation.
⚡ Transponder Protocols
All Lane Hackers utilize three types of transponders:
The Lane Hackers utilize two transponder protocols:
⚡ Smuggling Operations
Smuggling activities are critical for the welfare and functionality of the Lane Hackers. Over-reliance on outside contractors is both dangerous and insecure. Due to constant limitations and financial needs which are thoroughly explained in the Lane Hacker Information Network, all Lane Hacker smuggling vessels are expected to ferry cargo over long distances by conducting the export and import routes shown in the imagegraphs. Only Lane Hackers who attained Fixer mastery are excepted from these restrictions.
The following tables explain in greater detail the purchase location and the selling locations of the exported commodity. The proposed route maximizes your efficiency and simultaneously increases safety in acceptable levels.
Export Routes
Import Routes
Intra-Liberty Routes
This is the internal cardamine distribution network. Lane Hackers constantly require large amounts of cardamine in order to survive. While the profits are not on par with the export or import routes, the internal routes are much shorter, making their overall efficiency much higher. The following table explains in greater detail the purchase location and the selling location of the intra-Liberty routes.
⚡ Special Tactical Maneuvers
WHACK - Worm Hole Assisted Cruise Kick [DEMONSTRATION]
The Lane Hackers have discovered how to charge cruise engines during wormhole travel. You need an operational jump gate and a helper. The helper is another ship you can form on which will normally perform jumping procedure (grouped non-hostile player or non-hostile NPC).
SNACK - SuperNova Antimatter Cannon Kill
SNACK is a maneuver that skilled bomber pilots use to instantly vaporize small unshielded ships such as fighters, freighters, bombers and unarmored gunships. Inexperienced pilots are especially susceptible to this maneuver. There are two common techniques of performing SNACK. Both of them require from you to put your opponent off his guard by pretending that you're not a real threat. The first technique requires from you to joust your opponent like in a normal duel. Using your EMP cannons strip shield of your opponent to minimum but do not take it down completely, as he will just break away to recharge his shields. On the next pass joust your opponent with a maximum speed and fire the antimatter cannon just after you take down its shield with one EMP salvo. The second technique requires from you to use engine kill and fly in a straight line and then quickly turn your ship around to face your pursuer. Opponent that is following you is an easy target for both EMP and antimatter cannons. Keep in mind, that there is nothing more humiliating for a fighter pilot than to be vaporized by a bomber. Knowledge of these techniques is the first step to counter them. Remember, never joust antimatter bombers but instead use sliding against them.
Maneuver Lock
You can use the chat box to lock many maneuvers like thrust, barrel roll, pitch or strafe. Simply press button bind to that maneuver and, while keeping it pressed, open the chat box by hitting Enter. Now release the button and hit ESC to return to normal flight.
Corkscrew Evasion [DEMONSTRATION]
Flat shaped smaller ships such as Vindicator can benefit from an easy technique of evasion based on corkscrew. Go to a cockpit mode and perform a maneuver lock on a barrel roll. Set a waypoint to your escape point and while staying in the cockpit mode thrust at full speed to your destination while using side thrusters and slightly circling around your main vector. This technique is most efficient at 400m and higher distance to your pursuers. It also allows you to run in a specific direction while loosing as little distance as possible.
Cruise Jumpstart [DEMONSTRATION]
Start your cruise engines, press and hold a strafe key and then the engine kill key. You are now charging your cruise engines while remaining more or less still. Open the chat box and hit Esc. That will lock the drift in place up until you touch strafe or Engine Kill again. Clear your target selection, by default Ctrl + T. You may now press F2 at any time, which will rapidly accelerate you to cruise speed, as your engines are charged already.
Minescape - Trade Lane Assisted Escape [DEMONSTRATION]
The most basic escape maneuver requires from you to simply drop a mine while taking a trade lane. The mine will hit the lane shortly after you have taken it preventing your pursuers from following you. If you cannot drop mines you need to take the lane and then jump out of it just before the last ring and then quickly shut it down. If timed correctly, your pursuers will drop out of the sequence in the middle of the lane, giving you safe distance to engage cruise. Lane assisted escape is possible only when you're outside of the firing range of your pursuers.
Gatescape - Jump Gate Assisted Escape
Gatescape is a variation of maneuvers that allows you to escape by using a nearby Jump Gate.
• If you are intercepting commercial traffic next to a gate, position your ship near the closest trade lane ring but make sure the ring does not temporarily deactivate from damage. That way when law enforcement shows up in your scanners quickly coming up via the trade lanes, you have but a few seconds to deactivate the nearby ring which will buy you enough time to run to the gate and jump with a significant head start.
• If you're seriously outnumbered and under heavy fire while being near a Jump Gate, simply dock to the gate and then on the other side quickly perform a lane assisted escape. The key element of this maneuver is to dock to a gate when your pursers are least expecting it. Feign an attack or use the gate as a cover in order to achieve this. You will gain few seconds advantage that could allow you to get out of firing range on the other side of the gate and take a trade lane undisrupted.
Feignscape - Wormhole Assisted Escape [DEMONSTRATION]
Feignscape is a risky maneuver of last resort that works very well against inexperienced pursuers. It requires from you to feign a docking sequence to a wormhole. It has the highest chance of success while performed on a jump hole, but is also possible on a jump gate. Lower distance to your pursuers and simply fly straight into a wormhole. To increase the chance of fooling your opponents, stop dodging and turn on the docking lights by using the /lights command, just before the entry point. Inexperienced pursuers will make the jump and as a result be unable to come back due to their jumpdrives recharging, giving you enough time to escape.
Shieldcruise
Shieldcruise is a risky maneuver of last resort that might be used in order to escape when other maneuvers failed or are not possible. The key element of this maneuver is to initiate cruise sequence when your pursers are least expecting it and having a jump gate or station to shield you from initial cruise disruptors. Feint an attack or dodge and then use a gate or station as a cover. Make sure your first attempt is successful, as it's unlikely you will catch your opponents off guard next time. This maneuver is also possible while hiding within a jump hole.
Driftscape [DEMONSTRATION]
Driftscape is a risky maneuver and should be used when both you and your pursuer are in cruise. This intricate maneuver is performed while cruising towards a Jump Gate, Trade Lane or Jump Hole, initiating engine kill to keep momentum at around 1k left to your escape route, then by swiftly turning your ship so that you can launch a cruise disruptor at your pursuer after which you turn back towards your escape route and ready to dock with it. This leaves your pursuer out of cruise and out of range to disrupt the lane or block your escape route and provides you with a vital head start. It is strongly recommended to have countermeasures activated before you perform this maneuver.
Radar Tricks
► Radar Filter: Scroll through Radar modes to only have selection of piloted ships and prevent hostile solar objects or drones to obstruct your target selection. [DEMONSTRATION]
► Radar Glimpse: While unreliable, it is the only known way to catch a glimpse of a target's location when it is further than 10k away. [DEMONSTRATION]
⚡ Tactical Principles of Transport Interdiction
Blockade
Stationary blockade is the most common form of piracy as it can be performed equally well both by an individual as well as by a group. It is discouraged to conduct such operations with a group bigger than two ships, as it attracts too much attention. We are not the Liberty Rogues to set camps on the Mojave lane and wait for the Liberty Navy to send their whole fleet there. Besides that it is just a waste of Lane Hackers' talents that can be utilized in more sophisticated ways. It is much better to use spare fighters to lodge the prey into a blockade. Following are general guidelines for a stationary blockade.
Check Spyglass Network Scanner for the density of the commercial traffic. Find a good spot for a blockade. The middle of a long trade lane which is the main transit route between systems or a busy jumpgate with no stations on each side are the best choices. Stop all commercial traffic going right into your blockade by disrupting a trade lane ring and firing cruise disruptors. Scan your victims for cargo and identification and then state your demands. Strip them of their shields if they run, open fire, refuse or remain silent for too long. Give a final warning before destroying the transport. In the event of being spotted by the lawful forces retreat on the assumption that they will soon receive reinforcements. Optionally, you can lure them into an ambush outside of the main patrolling zone and there assassinate them.
Hunting
Hunting Ageira Technologies flunkies, Deep Space Engineering milksops, Interspace Commerce lapdogs and Independent Neuralnet Division hoodlums is the staff of life for the Lane Hackers. The key to a successful hunt are correct prediction of target's destination, maintaining a low profile and finally outwitting your opponent. If you're hunting with a wingman use private channel instead of a group communication for coordination. Following are general guidelines for hunting. Check the long range scanners or hack USI for potential high profile targets. Consult Spyglass Network Scanner for the target's route and possible destinations. Choose an interception point, or points if you are not working alone, taking into consideration target's speed and destination. If you're preparing an ambush at a jumphole or jumpgate, choose the system that is crowded.
Honeytrap [EXAMPLE]
Honeytrap is one of the most difficult types of transport interdiction, and it is advisable to be used only in situations when your target travels outside your operational zone or is ahead of you and cannot be reached in time. This method requires two Lane Hackers or use of a unknown stealth or coded transponder. In order to perform this tactic, one Lane Hacker should switch to an untagged ship equipped with an official Lane Hacker ID and IFF and contact the target. This is where the Hacker's cunning, quick thinking and superior intelligence comes in. The Lane Hacker should successfully pretend to be someone else and convince the target do something for them or redirect its set course or simply stop. If successful, the other operatives will certainly hit the target and with little danger involved. However as this tactic depends on high persuasion skills and a number of uncontrolled factors, it has the lowest chances of success so it is advisable to be used only when all the other types of transport interdiction are not applicable.
Lockdown
Lockdowns are the trademark of the Lane Hackers. They require significant organization, discipline and tactics. You need from two up to four ships in order to prepare a complete lockdown of an entire region. Analyse your region of choice, especially its main trade routes as well as jumphole and jumpgate network. Divide your hunting party into groups and assign them to all bottlenecks in the desired area. Make all groups be able to work alone or stay close enough to be able to reinforce each other if necessary. Make sure everyone has a backup escape plan so that you can retreat at a moment's notice. If it is possible, avoid using group communication and set your ambushes in the systems that are crowded. The best lockdown is the one of which nobody is aware of.
A lockdown is considered as successful when at least two commercial vessels is caught and extorted or destroyed and the LH team does not suffer any casualties until that point.
⚡ Operational protocols
Linguistic protocol
The Lane Hackers are the intellectual elite of the criminal world and as such they find amusement in using rare and sophisticated invectives. The following and similar elaborate insults allow Hackers to culturally slap in the face representatives of corrupt and devious corporations as well as vile and nefarious authorities: cad, cockalorum, flunky, hobbledehoy, hoodlum, hypocrite, knave, lackey, lapdog, lickspittle, milksop, mooncalf, mumpsimus, ninnyhammer, patsy, pet, pettifogger, rapscallion, reprobate, ruffian, scalawag, scamp, scapegrace, shill, smellfungus, snollygoster, weasel, wretch. For instance: "You are just a corrupt lackey for the commercial oligarchy!"
The Lane Hackers are made up of the elite of the technical world, so the use of technical terms is preferred. All of these terms and similar can be mixed and matched: atomic disgronification, molecular dissolution, cellular separation, financial ruination, rapid decompression, hull discombobulation. For instance, "Provide two million credits to The Lane Hackers or be atomically disgronified!" Remember at all times that you are a Lane Hacker, and speak and act like a Lane Hacker. The Methods available in our official documents are very important guidelines for your behavior.
Mania-Interrogation Protocol
![[Image: 20.png]](http://lh.discoverygc.com/media/20.png)
Mania-interrogation is the legendary method of interrogation used by the Lane Hackers. Mainly employed on high-profile victims, this interrogation is usually performed on captured or surrendered targets in order to ensure maximum compliance. The victim can be any person considered to be an enemy of the Lane Hackers. During the mania-interrogation the victim is humiliated, disgraced, embarassed, blackmailed, threatened, tortured, bullied and abused until they confess what the Lane Hackers seek to obtain. The most violent and perfect interrogations usually leave an empty husk of a body in the end, which is further exploited by being moved to Malta for manual labor until the end of its days.
A mania-interrogation is considered successful after the victim does one of the following:
• Due to immense humiliation and disgrace, the victim freely admits of his interrogator's vast superiority in every level and field compared to their meaningless existence.
• Due to immense torture and abuse, the victim freely admits despicable actions done by themselves, or by their organization, or by their allies.
• Due to immense bullying and blackmailing, the victim freely admits that the Lane Hacker cause is just and great in a system-wide public channel, in a populated system.
Extraordinary mania interrogations outside of the above mentioned scenarios will be considered on a case by case basis.
Hacking Protocol
The Lane Hacker securely encrypted comm channels are constructed to be impenetrable to the dull-witted flunkies of Ageira, Interspace and their silly cohorts in the LPI and LSF. All Lane Hackers must use correct hacking protocols at all times. All comm channel hacks should follow following encoding procedure found in the Lane Hacker Internal Comms.
Electronic Warfare Protocol
The Lane Hacker Assassins are known for proficiency in electronic warfare. During combat they often upload viruses or packets of random data to attack navigational or weapon systems of the target to reduce its combat potential. Assassins also tend to hack and overload power-cores of heavily damaged ships or even perform full hostile takeover of their navigation and lead them into gas packets or mines. Following is an example of an electronic warfare attack sequence:
⚡ Knowledge Base
Anonymous Initiate log
Classic flight interface
This is one of the most common and intuitive configuration setups ideal for fast paced combat, where stress is put on intuitive movement and quick access to special weapons. As it uses weapon groups instead of particular weapon type bindings, it is also equally applicable to most ship classes. Example weapon group configurations can be found below.
![[Image: 29.png]](http://lh.discoverygc.com/media/29.png)
...encryption.in.progress...disconnecting.from.network...hack.terminated...
...Mactan.Network.recognized...encoding.transmission...
...uploading.data...
The Lane Hackers
"Making the corporate weenies cry, so our kids can live in a free and just galaxy."
"The Lane Hackers are a criminal group with the technical expertise to monitor and disrupt Trade Lanes for the purpose of seizing valuable cargo. The powerful alliance between Lane Hackers, Liberty Rogues and Outcasts serves as the dominant unlawful force in Liberty space and most Independent Worlds."
Information • Recruitment • Diplomatic Channel • Internal Comms • Manual
Dossiers • Mission Archives • Assassin Assignments • Job Board
Radio Free Liberty • External Statements
Mactan Network
Dossiers • Mission Archives • Assassin Assignments • Job Board
Radio Free Liberty • External Statements
Mactan Network
Technical Manual
Directory |
| ⚡ Transponder Protocols ⚡ Smuggling Operations ⚡ Special Tactical Maneuvers ⚡ Tactical Principles of Transport Interdiction ⚡ Operational protocols ⚡ Knowledge Base |
The Lane Hacker Manual is composed of the Technical Manual and the Lore Manual.
The Technical Manual focuses on the technical aspect of the faction and explains how to speak as a Lane Hacker or get the proper IFF or use the appropriate opening and closing text for a communications post.
This manual also provides information about our established smuggling routes. It also offers a small tutorial on how to configure your keyboard or weapon groups. It explains a number of special tactical maneuvers which are required to demonstrate in order to be promoted. Finally, the Technical Manual also describes how to effectively hunt down your targets, update your transponder and provide pilots for Interrogation.
⚡ Transponder Protocols
All Lane Hackers utilize three types of transponders:
- Logged Transponders (eg.: LH~Nicole.Hunter, LH~Infiltrator)
- Stealth Transponders (eg.: Nicole.Hunter, Vladimir.Scorpius)
- Coded Transponders (eg. Midnight!, Starlight)
The Lane Hackers utilize two transponder protocols:
- Logged Flights Protocol: During beginning of each quarter of the year The Lane Hackers employ Logged Flights Protocol. Only Logged Transponders are allowed during this period and it applies to all ranks equally with the only exception being special operations that require use of Coded Transponders by their mission parameters.
- Stealth Operations Protocol: Once over 72 hours of logged flights are recorded a Stealth Operations Protocol is introduced for the rest of the quarter. During this period all Lane Hackers are allowed and encouraged to use Stealth Transponders on their personal ships. Infiltrators and higher ranked members can also freely employ Coded Transponders. All Hackers are required to keep their profile updated for all stealth and coded ships. It is encouraged to keep these entries even during logged period.
⚡ Smuggling Operations
Smuggling activities are critical for the welfare and functionality of the Lane Hackers. Over-reliance on outside contractors is both dangerous and insecure. Due to constant limitations and financial needs which are thoroughly explained in the Lane Hacker Information Network, all Lane Hacker smuggling vessels are expected to ferry cargo over long distances by conducting the export and import routes shown in the imagegraphs. Only Lane Hackers who attained Fixer mastery are excepted from these restrictions.
The following tables explain in greater detail the purchase location and the selling locations of the exported commodity. The proposed route maximizes your efficiency and simultaneously increases safety in acceptable levels.
Export Routes
Purchase Location | Sale Locations | |
Black Market Pharmaceuticals | • Rochester Base, New York | • Vogtland Base, Dresden • Arranmore Base, Dublin • Hikone Base, Honshu • Planet Malta, Omicron Alpha |
Counterfeit Computerware | • Cochrane Depot, Ontario | • Vogtland Base, Dresden • Arranmore Base, Dublin • Hikone Base, Honshu • Planet Malta, Omicron Alpha |
Import Routes
Purchase Location | Sale Locations | |
Black Market Augments | • Hikone Base, Honshu | • Mactan Base, Magellan |
Black Market Munitions | • Vogtland Base, Dresden | • Leiden Base, Galileo • Mactan Base, Magellan • Cochrane Depot, Ontario |
Cardamine Cardamine Cartridges | • Planet Malta, Omicron Alpha | • Cochrane Depot, Ontario |
Hessian Tears | • Vogtland Base, Dresden | • Rochester Base, New York |
Gold | • Arranmore Base, Dublin | • Rochester Base, New York • Thunder Bay Depot, Ontario |
Intra-Liberty Routes
This is the internal cardamine distribution network. Lane Hackers constantly require large amounts of cardamine in order to survive. While the profits are not on par with the export or import routes, the internal routes are much shorter, making their overall efficiency much higher. The following table explains in greater detail the purchase location and the selling location of the intra-Liberty routes.
Purchase Locations | Sale Locations | |
Black Market Pharmaceuticals | • Rochester Base, New York | • Leiden Base, Galileo • Mactan Base, Magellan • Cochrane Depot, Ontario |
Cardamine Cartridges | • Leiden Base, Galileo • Mactan Base, Magellan | • Rochester Base, New York • Cochrane Depot, Ontario |
Counterfeit Computerware | • Cochrane Depot, Ontario | • Leiden Base, Galileo • Mactan Base, Magellan • Rochester Base, New York |
Liberty Ale | • Thunder Bay Depot, Ontario | • Cochrane Depot, Ontario |
⚡ Special Tactical Maneuvers
WHACK - Worm Hole Assisted Cruise Kick [DEMONSTRATION]
The Lane Hackers have discovered how to charge cruise engines during wormhole travel. You need an operational jump gate and a helper. The helper is another ship you can form on which will normally perform jumping procedure (grouped non-hostile player or non-hostile NPC).
- Get your ship inside the jump gate while facing the helper.
- Engage cruise the moment the helper begins final phase of the docking maneuver. It is signified by the red blinking docking lights.
- Form on the helper.
SNACK - SuperNova Antimatter Cannon Kill
SNACK is a maneuver that skilled bomber pilots use to instantly vaporize small unshielded ships such as fighters, freighters, bombers and unarmored gunships. Inexperienced pilots are especially susceptible to this maneuver. There are two common techniques of performing SNACK. Both of them require from you to put your opponent off his guard by pretending that you're not a real threat. The first technique requires from you to joust your opponent like in a normal duel. Using your EMP cannons strip shield of your opponent to minimum but do not take it down completely, as he will just break away to recharge his shields. On the next pass joust your opponent with a maximum speed and fire the antimatter cannon just after you take down its shield with one EMP salvo. The second technique requires from you to use engine kill and fly in a straight line and then quickly turn your ship around to face your pursuer. Opponent that is following you is an easy target for both EMP and antimatter cannons. Keep in mind, that there is nothing more humiliating for a fighter pilot than to be vaporized by a bomber. Knowledge of these techniques is the first step to counter them. Remember, never joust antimatter bombers but instead use sliding against them.
Maneuver Lock
You can use the chat box to lock many maneuvers like thrust, barrel roll, pitch or strafe. Simply press button bind to that maneuver and, while keeping it pressed, open the chat box by hitting Enter. Now release the button and hit ESC to return to normal flight.
Corkscrew Evasion [DEMONSTRATION]
Flat shaped smaller ships such as Vindicator can benefit from an easy technique of evasion based on corkscrew. Go to a cockpit mode and perform a maneuver lock on a barrel roll. Set a waypoint to your escape point and while staying in the cockpit mode thrust at full speed to your destination while using side thrusters and slightly circling around your main vector. This technique is most efficient at 400m and higher distance to your pursuers. It also allows you to run in a specific direction while loosing as little distance as possible.
Cruise Jumpstart [DEMONSTRATION]
Start your cruise engines, press and hold a strafe key and then the engine kill key. You are now charging your cruise engines while remaining more or less still. Open the chat box and hit Esc. That will lock the drift in place up until you touch strafe or Engine Kill again. Clear your target selection, by default Ctrl + T. You may now press F2 at any time, which will rapidly accelerate you to cruise speed, as your engines are charged already.
Minescape - Trade Lane Assisted Escape [DEMONSTRATION]
The most basic escape maneuver requires from you to simply drop a mine while taking a trade lane. The mine will hit the lane shortly after you have taken it preventing your pursuers from following you. If you cannot drop mines you need to take the lane and then jump out of it just before the last ring and then quickly shut it down. If timed correctly, your pursuers will drop out of the sequence in the middle of the lane, giving you safe distance to engage cruise. Lane assisted escape is possible only when you're outside of the firing range of your pursuers.
Gatescape - Jump Gate Assisted Escape
Gatescape is a variation of maneuvers that allows you to escape by using a nearby Jump Gate.
• If you are intercepting commercial traffic next to a gate, position your ship near the closest trade lane ring but make sure the ring does not temporarily deactivate from damage. That way when law enforcement shows up in your scanners quickly coming up via the trade lanes, you have but a few seconds to deactivate the nearby ring which will buy you enough time to run to the gate and jump with a significant head start.
• If you're seriously outnumbered and under heavy fire while being near a Jump Gate, simply dock to the gate and then on the other side quickly perform a lane assisted escape. The key element of this maneuver is to dock to a gate when your pursers are least expecting it. Feign an attack or use the gate as a cover in order to achieve this. You will gain few seconds advantage that could allow you to get out of firing range on the other side of the gate and take a trade lane undisrupted.
Feignscape - Wormhole Assisted Escape [DEMONSTRATION]
Feignscape is a risky maneuver of last resort that works very well against inexperienced pursuers. It requires from you to feign a docking sequence to a wormhole. It has the highest chance of success while performed on a jump hole, but is also possible on a jump gate. Lower distance to your pursuers and simply fly straight into a wormhole. To increase the chance of fooling your opponents, stop dodging and turn on the docking lights by using the /lights command, just before the entry point. Inexperienced pursuers will make the jump and as a result be unable to come back due to their jumpdrives recharging, giving you enough time to escape.
Shieldcruise
Shieldcruise is a risky maneuver of last resort that might be used in order to escape when other maneuvers failed or are not possible. The key element of this maneuver is to initiate cruise sequence when your pursers are least expecting it and having a jump gate or station to shield you from initial cruise disruptors. Feint an attack or dodge and then use a gate or station as a cover. Make sure your first attempt is successful, as it's unlikely you will catch your opponents off guard next time. This maneuver is also possible while hiding within a jump hole.
Driftscape [DEMONSTRATION]
Driftscape is a risky maneuver and should be used when both you and your pursuer are in cruise. This intricate maneuver is performed while cruising towards a Jump Gate, Trade Lane or Jump Hole, initiating engine kill to keep momentum at around 1k left to your escape route, then by swiftly turning your ship so that you can launch a cruise disruptor at your pursuer after which you turn back towards your escape route and ready to dock with it. This leaves your pursuer out of cruise and out of range to disrupt the lane or block your escape route and provides you with a vital head start. It is strongly recommended to have countermeasures activated before you perform this maneuver.
Radar Tricks
► Radar Filter: Scroll through Radar modes to only have selection of piloted ships and prevent hostile solar objects or drones to obstruct your target selection. [DEMONSTRATION]
► Radar Glimpse: While unreliable, it is the only known way to catch a glimpse of a target's location when it is further than 10k away. [DEMONSTRATION]
⚡ Tactical Principles of Transport Interdiction
Blockade
Stationary blockade is the most common form of piracy as it can be performed equally well both by an individual as well as by a group. It is discouraged to conduct such operations with a group bigger than two ships, as it attracts too much attention. We are not the Liberty Rogues to set camps on the Mojave lane and wait for the Liberty Navy to send their whole fleet there. Besides that it is just a waste of Lane Hackers' talents that can be utilized in more sophisticated ways. It is much better to use spare fighters to lodge the prey into a blockade. Following are general guidelines for a stationary blockade.
Check Spyglass Network Scanner for the density of the commercial traffic. Find a good spot for a blockade. The middle of a long trade lane which is the main transit route between systems or a busy jumpgate with no stations on each side are the best choices. Stop all commercial traffic going right into your blockade by disrupting a trade lane ring and firing cruise disruptors. Scan your victims for cargo and identification and then state your demands. Strip them of their shields if they run, open fire, refuse or remain silent for too long. Give a final warning before destroying the transport. In the event of being spotted by the lawful forces retreat on the assumption that they will soon receive reinforcements. Optionally, you can lure them into an ambush outside of the main patrolling zone and there assassinate them.
Hunting
Hunting Ageira Technologies flunkies, Deep Space Engineering milksops, Interspace Commerce lapdogs and Independent Neuralnet Division hoodlums is the staff of life for the Lane Hackers. The key to a successful hunt are correct prediction of target's destination, maintaining a low profile and finally outwitting your opponent. If you're hunting with a wingman use private channel instead of a group communication for coordination. Following are general guidelines for hunting. Check the long range scanners or hack USI for potential high profile targets. Consult Spyglass Network Scanner for the target's route and possible destinations. Choose an interception point, or points if you are not working alone, taking into consideration target's speed and destination. If you're preparing an ambush at a jumphole or jumpgate, choose the system that is crowded.
Honeytrap [EXAMPLE]
Honeytrap is one of the most difficult types of transport interdiction, and it is advisable to be used only in situations when your target travels outside your operational zone or is ahead of you and cannot be reached in time. This method requires two Lane Hackers or use of a unknown stealth or coded transponder. In order to perform this tactic, one Lane Hacker should switch to an untagged ship equipped with an official Lane Hacker ID and IFF and contact the target. This is where the Hacker's cunning, quick thinking and superior intelligence comes in. The Lane Hacker should successfully pretend to be someone else and convince the target do something for them or redirect its set course or simply stop. If successful, the other operatives will certainly hit the target and with little danger involved. However as this tactic depends on high persuasion skills and a number of uncontrolled factors, it has the lowest chances of success so it is advisable to be used only when all the other types of transport interdiction are not applicable.
Lockdown
Lockdowns are the trademark of the Lane Hackers. They require significant organization, discipline and tactics. You need from two up to four ships in order to prepare a complete lockdown of an entire region. Analyse your region of choice, especially its main trade routes as well as jumphole and jumpgate network. Divide your hunting party into groups and assign them to all bottlenecks in the desired area. Make all groups be able to work alone or stay close enough to be able to reinforce each other if necessary. Make sure everyone has a backup escape plan so that you can retreat at a moment's notice. If it is possible, avoid using group communication and set your ambushes in the systems that are crowded. The best lockdown is the one of which nobody is aware of.
A lockdown is considered as successful when at least two commercial vessels is caught and extorted or destroyed and the LH team does not suffer any casualties until that point.
⚡ Operational protocols
Linguistic protocol
The Lane Hackers are the intellectual elite of the criminal world and as such they find amusement in using rare and sophisticated invectives. The following and similar elaborate insults allow Hackers to culturally slap in the face representatives of corrupt and devious corporations as well as vile and nefarious authorities: cad, cockalorum, flunky, hobbledehoy, hoodlum, hypocrite, knave, lackey, lapdog, lickspittle, milksop, mooncalf, mumpsimus, ninnyhammer, patsy, pet, pettifogger, rapscallion, reprobate, ruffian, scalawag, scamp, scapegrace, shill, smellfungus, snollygoster, weasel, wretch. For instance: "You are just a corrupt lackey for the commercial oligarchy!"
The Lane Hackers are made up of the elite of the technical world, so the use of technical terms is preferred. All of these terms and similar can be mixed and matched: atomic disgronification, molecular dissolution, cellular separation, financial ruination, rapid decompression, hull discombobulation. For instance, "Provide two million credits to The Lane Hackers or be atomically disgronified!" Remember at all times that you are a Lane Hacker, and speak and act like a Lane Hacker. The Methods available in our official documents are very important guidelines for your behavior.
Mania-Interrogation Protocol
Mania-interrogation is the legendary method of interrogation used by the Lane Hackers. Mainly employed on high-profile victims, this interrogation is usually performed on captured or surrendered targets in order to ensure maximum compliance. The victim can be any person considered to be an enemy of the Lane Hackers. During the mania-interrogation the victim is humiliated, disgraced, embarassed, blackmailed, threatened, tortured, bullied and abused until they confess what the Lane Hackers seek to obtain. The most violent and perfect interrogations usually leave an empty husk of a body in the end, which is further exploited by being moved to Malta for manual labor until the end of its days.
A mania-interrogation is considered successful after the victim does one of the following:
• Due to immense humiliation and disgrace, the victim freely admits of his interrogator's vast superiority in every level and field compared to their meaningless existence.
• Due to immense torture and abuse, the victim freely admits despicable actions done by themselves, or by their organization, or by their allies.
• Due to immense bullying and blackmailing, the victim freely admits that the Lane Hacker cause is just and great in a system-wide public channel, in a populated system.
Extraordinary mania interrogations outside of the above mentioned scenarios will be considered on a case by case basis.
Hacking Protocol
The Lane Hacker securely encrypted comm channels are constructed to be impenetrable to the dull-witted flunkies of Ageira, Interspace and their silly cohorts in the LPI and LSF. All Lane Hackers must use correct hacking protocols at all times. All comm channel hacks should follow following encoding procedure found in the Lane Hacker Internal Comms.
Electronic Warfare Protocol
The Lane Hacker Assassins are known for proficiency in electronic warfare. During combat they often upload viruses or packets of random data to attack navigational or weapon systems of the target to reduce its combat potential. Assassins also tend to hack and overload power-cores of heavily damaged ships or even perform full hostile takeover of their navigation and lead them into gas packets or mines. Following is an example of an electronic warfare attack sequence:
*enabling.electronic.warfare.module*
*opening.target.socket.via.Trade.Lane.star.charts.update.protocol*
*uploading.virus.Watergun.Mk.III...upload.successful*
*reducing.weapons.accuracy.by.20.percent*
*sending.random.bit.data.streams...reduced.maneuverability.detected*
*firewall.breach.detected...initiating.hostile.takeover*
*hostile.takeover.completed...initiating.powercore.overload.sequence*
⚡ Knowledge Base
Anonymous Initiate log
16:45 ...sold all ammunition, bought WASP, Heavy Thruster and started to look for appropriate missions...
16:48 ...successfully completed capture mission for Outcasts worth 670 000 SC...
16:57 ...successfully completed assassination for Lane Hackers worth 500 000 SC...
17:03 ...successfully completed assassination for Outcasts worth 490 000 SC...
17:13 ...successfully completed cargo retrieval for Lane Hackers worth 445 000 SC...
17:17 ...successfully completed base destruction for Lane Hackers worth 355 000 SC...
17:20 ...reached Montezuma and bought Bactrian...
17:25 ...returned to Mactan and armed my ship...
17:32 ...successfully completed cargo retrieval for Lane Hackers worth 485 000 SC...
17:32 ...armed my ship with additional weapons and equipment...
17:35 ...successfully performed transponder hack and switched to Lane Hacker Guard IFF...
17:44 ...successfully completed assassination for Outcasts worth 1 600 000 SC...
17:53 ...successfully completed cargo retrieval for Lane Hackers worth 1 050 000 SC...
17:56 ...upgraded ship equipment...
17:57 ...counted 30 captured bounty hunters in my cargo hold...
17:59 ...successfully completed base destruction for Lane Hackers worth 600 000 SC...
18:01 ...reached Montezuma again to look for appropriate missions...
18:03 ...aborted assassination mission for Liberty Rogues worth 1 800 000 SC due to gunship presence...
18:13 ...successfully completed assassination for Liberty Rogues worth 1 000 000 SC...
18:17 ...aborted capture mission for Liberty Rogues worth 1 600 000 SC due to gunship presence...
18:23 ...successfully completed base destruction for Liberty Rogues worth 465 000 SC...
18:29 ...successfully completed base destruction for Liberty Rogues worth 800 000 SC...
18:30 ...successfully performed transponder hack and gained Liberty Rogue friendly reputation...
18:32 ...counted 50 captured bounty hunters and over 3 000 0000 SC on my account...
Classic flight interface
This is one of the most common and intuitive configuration setups ideal for fast paced combat, where stress is put on intuitive movement and quick access to special weapons. As it uses weapon groups instead of particular weapon type bindings, it is also equally applicable to most ship classes. Example weapon group configurations can be found below.
![[+]](/forums/images/collapse_collapsed.png "[+]") 1. The Lane Hacker sources
1. The Lane Hacker sources
 During his escape to Magellan, Drake Thastus was commanding
 ![[Image: 34.png]](http://lh.discoverygc.com/media/34.png)