Welcome to Discovery Freelancer!
- We are an online, English-speaking roleplay community that welcomes experienced and inexperienced roleplayers alike.
- Our story expands the Freelancer universe, 34 years after the single player campaign.
- Discovery tells a story of conflict across Sirius - pirates, traders, military and aliens frequently clash in Player Versus Player (PVP) combat.
- Please check out the server rules.
Useful links
Basic Details
- From the main menu, click Multiplayer and then join the "Discovery Freelancer RP 24/7" server.
- Click 'New Character' and type in your ship name. Please do not use country tags (such as [UK], [GER], [RUS], etc) or pop culture references.
- Your account can contain up to 7 different ships. You can generate extra accounts through the Discovery Launcher.
- Join the server with your new character. You will begin your journey in the Pennsylvania System, Liberty.
- Press Y to see the players that are currently online. Clicking a player's name will target them for a direct message.
- Press enter to open the chat box. Hitting enter again will send your message. By default, message are sent 'locally' to players in sensor range.
- Press F1 to open the game menu. Here you can quit the game (only do this when docked) and check settings or controls.
Roleplay
- Roleplay is simply imagining a character, then playing and chatting the way they would.
- Your roleplay can be as straightforward or complex as you like - we welcome both lite and heavy roleplay.
- Choose a role for your character. Some basic examples for inspiration include:
- Trader: An ambitious House merchant who wants to get rich and climb the corporate ladder.
- Military: A proud soldier who despises criminals and enforces the law at the barrel of a gun.
- Pirate: A ruthless marauder who is willing to do whatever it takes to achieve wealth, power and infamy.
- Freelancer: An idealistic explorer who wants to push back frontiers and discover new wonders.
- All the public messages you send on the server should be "in character". If you need to send an "out of character" message, type "// " before your chat text.
Getting Started
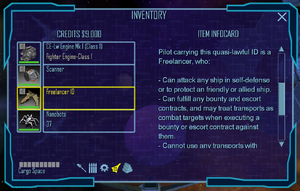
- Your new character begins their journey on Planet Erie in Pennsylvania, Liberty. You have a fully equipped Kestrel freighter with a Freelancer ID.
- Click on the ship icon in the starting Spaceport area and you'll launch to space.
- Check out the new player buoys outside Erie, then get used to moving around.
- Left click selects objects.
- Right click fires any active weapons.
- Mouse wheel controls impulse speed.
- TAB activates thrusters for a short speed boost.
- Z kills your engines, letting you drift and turn without changing velocity.
- CTRL + W disables your guns and activates cruise engines - a much faster way to travel long distances.
- F2 activates GO-TO mode. Your ship will autopilot in a straight line to the selected object.
- F3 activates DOCK mode. If you are within 20k of a dockable object, your ship autopilot will dock with it.
- F4 activates FORMATION mode. You will fly alongside an NPC or player you are grouped with, copying their movements.
- Now you're comfortable navigating your ship, you need to make some credits. You have three main starting options:
- Mining.
- Trading.
- Combat.
- It is recommended that you set up a character for trading or mining that you can use to fund your other characters.
Mining in Pennsylvania
- Pennsylvania has fields of Helium to mine. After you undock from Erie, turn to your right and follow the trail of navigation buoys.
 The mining zone contains a buoy labelled "Mineable Zone" and is surrounded by Hegemon mining ships.
 - Hint: If you can't find the trail, look at your contacts panel (bottom left) and click into the "Structures" tab. This will display any nearby bases or static objects. You'll be able to select the first navigation buoy from there.
- This will lead to the Meadville Ice Asteroid Field (Sector 5C on the NavMap).
- Deactivate your guns by either clicking on them one by one on the weapons panel (bottom right) or pressing "2" to swap to an empty weapons group. Activate the Mining Laser that comes pre-installed by clicking on it.
- You can now shoot the small moving asteroids to drop Helium. Your cursor will turn into a rotating white crosshair when you have an asteroid targeted.
- Mining asteroids will deposit Helium directly into your cargo bay. When you are full, you can either trade the Helium to a NPC base (see the Trading section), sell it to a player, or sell it to a nearby Player Owned Base (POB).
- POBs are bases that have been constructed by players on the Discovery Freelancer RP 24/7 server, with player-set prices for commodities. Nearby examples include Emlenton Storage & Exports and Pennsylvania Freeport.
- To sell your Helium (or any other cargo you've come across), land on a base and click on the Commodity Trader. Clicking the Trader NPC will open the Commodities screen where you can buy or sell goods.
Next Steps:
- As you make more money, you'll want to move up into bigger ships, so you can make money even quicker. If you want to continue mining Helium in Pennsylvania, your best option is a Hegemon Asteroid Miner. This can be purchased on Harrisburg Station outside Planet Erie.
- If you would like to try other mining zones, check the Mining page. Corporations mine different ores that are refined into valuable products through Player Owned Bases. These mining operations are most profitable in groups, so it is recommended to find other players to work with.
Basic Trading
- Start out by obtaining a full cargo load of Helium (see above). Next, we'll be leaving Pennsylvania and crossing Liberty and Kusari to head to the distant Sigmas.
- Open your Inventory (F7) and go to the Commodities tab. Select your Helium and then press the "Show Routes" button. This will give you price data about every station you already know, or have docked on.
- Select Helgoland Station in Sigma-13. Your NavMap will zoom to it - click it to bring up the map context menu, then select "Set Best Path". You will now have a trail of waypoints leading to your destination.
- This route will take you through Pennsylvania, New York, Colorado, Galileo, Shikoku, New Tokyo, Honshu and Sigma-13 to your destination. Sell the Helium at Helgoland.
- Buy MOX from Helgoland Station, and take it to Gas Miner Naha one Trade Lane away.
- Pick up H-Fuel from Gas Miner Naha. H-Fuel is very expensive because it is a High Risk Commodity (HRC) - a full load is a big investment, but selling it is a massive reward. You may not be able to afford a full cargo hold - for this tutorial we will head back to Planet Erie with it.
Next Steps:
- Transport ships are great sources of income you can use to fund the rest of your characters. Normal transports have a maximum cargo size of 5,000, with the use of these large transports usually restricted to House Corporations.
- Some basic transports are available near Erie. On Valley Forge Flight School there are the Transport and Large Transport light transports. On Harrisburg Station there are the Mammoth and Train medium transports.
Combat in Pennsylvania
- Fighting NPCs (PvE) is another way to make money, although this is less profitable than trading or mining. When you kill an NPC, you will automatically receive a bounty payout. The amount depends on the type of NPC. For basic fighters, you will usually receive $3,000 per kill.
- Hint: NPC kill bounties are split with any other players you are in a group with, however teaming up will help you tackle more difficult (and valuable) threats.
- You should familiarise yourself with some combat basics:
- Firing your weapons depletes your ship's power core - this is the yellow bar at the bottom of the screen. Entering cruise mode drains your power bar completely.
- Your shields will block all damage before they damage your hull - this is the blue bar at the bottom of the screen. When you lose shields, there will be a short delay before they pop back up and begin recharging.
- If you hull is entirely depleted, your ship will explode - this is the red bar at the bottom of the screen. If you die, you will lose any cargo or unmounted equipment you had, but you are otherwise okay.
- F activates Shield Batteries, instantly recharging your shields. G activates Nanobots, instantly restoring your hull.
- W, A, S, D allow you to strafe, which is very useful for evading shots when combined with your thrusters and evasive manoeuvring.
- You can toggle "weapon groups" on and off, to deactivate certain weapons at a key press. This is useful for activating and deactivating anti-shield weapons depending on your enemy's status.
- NPCs you kill will also drop equipment, Military Salvage, and Pilots. Pilots can be sold to Commodity Traders on stations for extra cash. Harrisburg Station is sponsoring a 'law and order campaign' and will pay $450 per Liberty Rogue or Xeno pilot.
- Military Salvage is less valuable on its own, however some Player Owned Bases will buy it for more, because it can be refined into Prototype Components that are used to produce valuable equipment.
- You can find NPCs to fight by taking missions from station Bars (click on the job board), or by flying into asteroid fields and looking for hostile patrol paths on your NavMap.
- When getting started, try to only take missions that are level 1 or 2 difficulty. Discovery's NPC AI is much more aggressive and capable than the base game, and can be very challenging until you are used to it.
- Make sure to read the mission description carefully. Some missions will send you NPC allies to assist you. Others only require a particular target or object to be destroyed. Some require all objectives and hostiles to be killed. This can drastically affect the difficulty.
- You can customise your equipment to your preferences - for example, if you are confident in your aim, you could try lower refire, higher damage weapons. Try to match your guns' projectile speeds to avoid throwing off your aim.
Next Steps:
- Your starting ship is a freighter that is designed for trading and mining, but it still packs a punch. Despite this, if you want to take on more dangerous threats, you will need a more specialised combat ship.
- Fighters include Light Fighters, Heavy Fighters, Very Heavy Fighters, Super Heavy Fighters and Bombers. VHFs, SHFs and Bombers are all adaptable ships that combine firepower with survivability.
- What combat ship you purchase will depend on the faction you want to join. Civilian and Border World ships are widely available for Freelancers and other independent pilots however.
- Gunboats are the smallest class of capital ship, pack a large amount of firepower and are very flexible. These are more expensive, but will allow you to tackle much more dangerous missions.
Factions and IDs
- Discovery has 68 different factions. Each of these has its own diplomacy, including allies and enemies.
- You can see factions you have encountered in your Repsheet by pressing F8. Clicking on a faction will provide more detail.
- When you kill NPCs, that faction will like you less, and their enemies will like you more. Hostile NPCs will attack you on sight.
- You can join a faction by buying and equipping their ID. IDs contain rules around what that faction can do and where. You must always have an ID equipped.
- The ID you have equipped may have "rephacks" set. These are used to lock your rep with certain groups, for example keeping your faction's enemies hostile.
- You can improve your reputation with a faction by killing their enemies, taking Bar missions for them, or through buying a Bribe.
- Bribes are offered by NPCs in station Bars (the NPC will show a "$" symbol when you mouse over them) which lets you pay for rep improvements.
- When you have maxed out your rep with a faction, it will be set as your IFF - this means that faction will be displayed in front of your name to other players.
- Your IFF will be listed at the top of your Repsheet (F8) and flashing yellow. If you have accidentally ended up with the wrong IFF, type /droprep to clear it.
Encountering Other Players
Game /commands
- Text.


